Introduction
Creating a professional folding layout in Adobe InDesign can feel tricky — especially when you’re working with a nonstandard size like 8.5 × 17 inches fold. But trust me: once you understand how to set it up, it becomes second nature. Over my years designing brochures, menus, and promo fold-outs, I’ve built a few fool proof techniques to make this smooth, clean, and print-ready.
In this guide, I’ll walk you step-by-step through:
- What “8.5×17 fold InDesign template” means
- How to plan your fold layout
- Setting up the InDesign document
- Building your folding panels
- Managing margins, bleeds, guides
- Adding content (text, images, styles)
- Exporting for print
- Common pitfalls & tips from real experience
I’ll also weave in semantic SEO keywords like “8.5×17 fold InDesign template,” “8.5×17 tri-fold template,” “InDesign 8.5×17 fold layout,” “8.5×17 brochure fold template,” and similar phrases — naturally, so the article reads well and helps with search.
Let’s dive in!
What Does “8.5×17 Fold InDesign Template” Mean?
First, break down the phrase:
- 8.5 × 17: This is the full unfolded size in inches.
- Fold / Folded layout: Means the final product will be folded in one or more panels (for instance, a gate fold, roll fold, or accordion fold).
- InDesign template: A preset file in Adobe InDesign (.indd or .idml) that sets up panels, guides, bleeds, margins, and sometimes placeholder content — so you can drop in your own text and images.
So when someone says “8.5×17 fold InDesign template,” they usually mean a template designed to be printed on a sheet 8.5″ wide × 17″ tall (or vice versa, depending orientation) and then folded into multiple panels or segments.
You might see variations like:
- 8.5×17 fold template InDesign
- InDesign 8.5×17 brochure fold
- 8.5×17 fold layout InDesign
- 8.5×17 brochure fold template
- 8.5×17 tri-fold (or roll fold, gate fold) template
These are all closely related and should appear naturally in your content.
Step 1: Plan Your Fold Style & Panel Count
Before you open InDesign, decide how you want to fold that 8.5×17 sheet. Some common options:
| Fold Style | Number of Panels | Typical Use Case |
|---|---|---|
| Half-Fold / Bi-Fold | 2 panels | Simple card, invitation-style layout |
| Tri-Fold (parallel) | 3 panels | Brochure with three sections |
| Gate-Fold | 4 panels (two outer, two inner) | High-impact reveal layouts |
| Roll-Fold | 3 or more panels | For extended content, menus, etc. |
| Accordion Fold | 4+ panels | Step-by-step guides, visual storytelling |
Because your sheet is relatively narrow and tall (if oriented portrait as 8.5 × 17), a half-fold or tri-fold vertical is common. But depending on design, you might also do a gate or roll fold.
Once you pick a fold, draw a quick sketch on paper: mark how many panels, in which order they appear when folded and unfolded. This “map” will help as you build the template.
Step 2: Create a New InDesign Document
Here’s the step-by-step to start the InDesign template:
- File → New → Document
- Intent: Print
- Units: Inches
- Page Size: 8.5 in (width) × 17 in (height) or 17 in × 8.5 in, depending on whether your fold is vertical or horizontal orientation.
- Orientation: Choose portrait or landscape based on your fold sketch.
- Number of Pages: Usually 1 (unfolded canvas)
- Facing Pages: Off, unless your fold design needs spreads
- Columns: Set to 1 for now
- Margins: Add a safety margin (e.g. 0.25″ or 0.125″, depending on printer).
- Bleed: Add a bleed like 0.125 in (1/8 inch) on all sides (top, bottom, left, right).
- Click “OK” to create the file.
You now have one full canvas sized 8.5×17 with margins and bleed.
Step 3: Add Fold / Panel Guides
This is crucial. You’ll break the canvas into panels where the folds go.
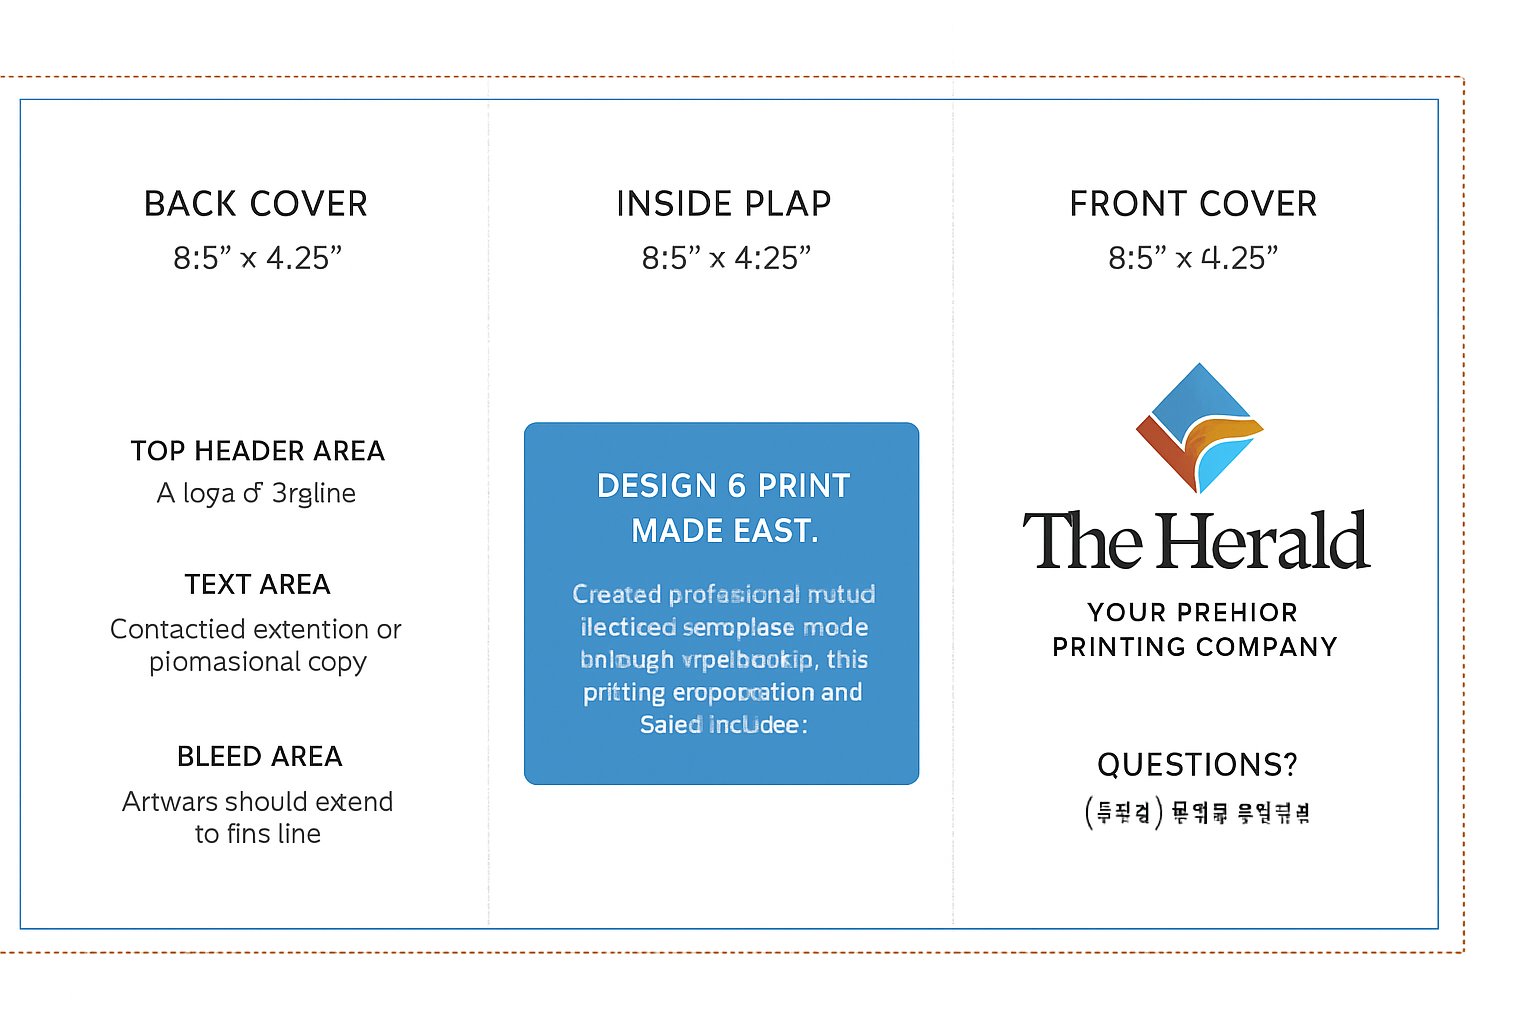
Let’s say you’re doing a vertical tri-fold (3 equal panels, folded inward like a brochure). Each panel width would be:
Total width (8.5”) ÷ 3 = 2.8333…″ (which is 2 + 5/6 or 2.8333)
But tiny decimals can bite you, so a typical layout might do:
- Panel 1: 2.83″
- Panel 2: 2.83″
- Panel 3: 2.84″ (to account for rounding)
In InDesign:
- Go to Layout → Create Guides
- Set Rows = 1, Columns = 3
- Gutter = 0
- Fit Guides to: Page
- Click OK
- Now you’ll see vertical guides dividing into three panels.
- Additionally, drag guides from the rulers to mark fold lines where panels meet.
If you’re doing a half fold, you’d instead put one vertical guide at 4.25″ (half of 8.5).
For gate fold, accordion, or roll folds, you’ll adjust accordingly — your sketch helps.
Step 4: Define Master Page & Layout Templates (Optional)
Using Master Pages helps you maintain consistency. If your folded piece has mirrored panels or repeated elements:
- Open the Pages panel (Window → Pages).
- Create a new Master, then define panel guides, shapes, or styles on it.
- Apply this master to your main page(s).
This way, if you later change layout, it cascades.
| You May Also Like: Timewarp Taskus: Unlock Explosive Productivity and Seamless Efficiency 2025 |
Step 5: Place Bleeds, Safe Zone, and Folds Considerations
- Everything critical (text, logos) should stay inside the margin / safe zone — away from fold lines and edges.
- Backgrounds or images that extend to edges should be bleed beyond the trim/edge so there’s no white border after cutting.
- Avoid placing essential content over fold lines — the fold may distort it or be cut slightly off.
- When panels fold inward, the first and last panels might not perfectly align due to paper thickness, so leave a tiny slack (0.01–0.02 in) between adjacent panel edges if needed.
Step 6: Add Content — Text, Images, Styles
Typography & Styles
- Create Paragraph Styles and Object Styles early (for headings, body, captions).
- Keep font sizes readable (minimum ~9–10 pt for body text, larger for headings).
- Use consistent leading, tracking, and alignment across panels.
Placing Text & Images
- Use Place (File → Place) to import images (JPEG, PNG, EPS).
- Fit images to frames with Fitting commands (Object → Fitting → Fit Content Proportionally, etc.).
- Use text frames and insets to control padding.
Utilization of Space Across Folds
- When unfolding, the panels should blend visually — e.g., background or image might span multiple panels.
- But content flow should follow the reading order. For a vertical tri-fold, typically left panel folds over middle, then right folds over — so consider how people open it.
Number of Versions (Front / Back)
You may design both front side (outer panels) and back side (inner panel backs) in one file, or separate InDesign pages.
Step 7: Proof & Preview Folds
- Use Preview Mode (W key) to hide frame edges and see the design more realistically.
- Print a draft version on regular paper, fold it by hand, and check alignment, bleed, margins, and content cutting.
- Make corrections to spacing, alignment, or bleed as needed.
Step 8: Export & Print Prep
When everything is solid:
- File → Export
- Format: Adobe PDF (Print)
- Preset: High Quality Print (or a custom press-ready preset)
- In the Export PDF dialog:
- General: Export All Pages
- Marks & Bleeds: Check Use Document Bleed Settings
- Don’t include crop/fold marks unless your printer wants them (or add as separate).
- Compression: Avoid excessive compression — keep images ~300 dpi
- Output: Use correct color space (CMYK for print)
- Send the PDF to your printer or print shop. Confirm they accept the format and settings.
Real Experience: Things I Learned The Hard Way
- Once I forgot to extend the background fully into bleed on one fold — the printer cut off part of the design. Since then, I always triple-check bleed on all edges.
- Some printers don’t account for slight “slack” between folding panels. In a busy 8.5×17 tri-fold, I now include a tiny 0.01 in gap between panels, which saved me from misalignment issues.
- Margins too tight lead to text disappearing or creasing. Always leave more safe space near fold lines.
- Fonts may look fine on screen but too small when printed — I always test print a mock.
- Using Master Pages early saved me massive rework when I decided to shift a panel layout later.